Toolbar Configuration
While CKEditor 4 is a full-featured WYSIWYG editor, not all of its options may be needed in all cases. Because of this, toolbar customization is one of the most common requirements.
The most recommended approach to adjusting the editor to your needs is to start from creating a custom build, removing unwanted features before they even make it to your toolbar. It is a bad practice to download the Full package and then remove plugins or buttons in your configuration. You will only be loading unnecessary stuff without any good reason.
There are several approaches to CKEditor 4 toolbar configuration to choose from:
- Using the toolbar configurator — the most recommended and easy to use solution.
- Toolbar groups configuration — requires manual toolbar configuration (for advanced users only)
- “Item by item” configuration — requires manual toolbar configuration (for advanced users only)
# Toolbar Configurator
Toolbar configurator was introduced in CKEditor 4.5 and is available in each official CKEditor 4 installation package.
The new toolbar utility, which you can find in your CKEditor 4 distribution package, makes configuring an accessible toolbar a breeze.
It is the most recommended way to set up the editor toolbar.
You can use it to change the order of toolbar groups, select and deselect buttons, or break the toolbar into rows. Your current configuration is previewed live in the attached editor instance so you get instant feedback regarding the look and feel of your toolbar. When you are happy with your settings you can just copy the generated source code to paste into your editor configuration.
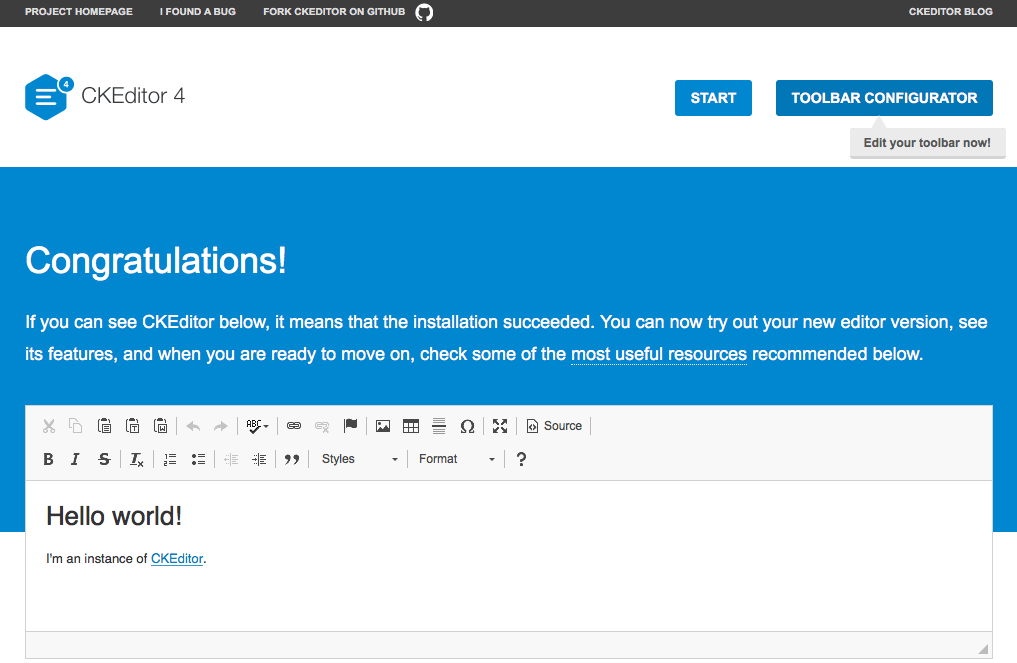
To open the toolbar configurator, go to the /samples/ folder of your CKEditor 4 installation and open the index.html file in your browser. You should be able to see a working CKEditor 4 sample which confirms that the installation succeeded.
Click the Toolbar Configurator button in the top right-hand corner of the sample page to proceed to editing your toolbar.

There are two types of toolbar configurator available: the basic, more visual one and the advanced one. The editor shown in the toolbar configurator contains all the features and buttons available in a particular CKEditor 4 build.
# Basic Toolbar Configurator
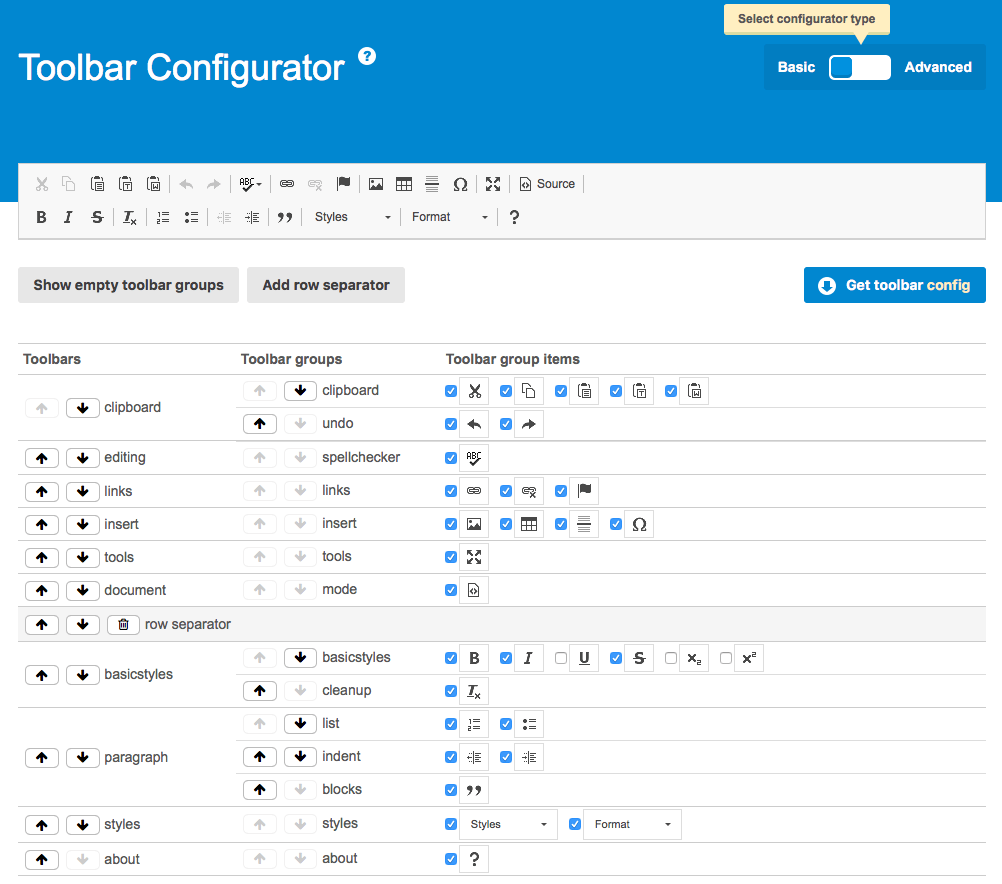
The basic toolbar configurator uses the “toolbar groups” approach which is the recommended way to arrange the editor toolbar. You can modify the order of the toolbar groups by clicking the Up and Down arrows and toggle button visibility by selecting and deselecting the checkboxes. Use the “Add row separator” button to create a new toolbar row.

When you are happy with your toolbar, click the “Get toolbar config” button to display the generated toolbar configuration. Add your new toolbar code to your editor configuration — if you have already changed some other configuration options, do remember to merge both configurations. Last but not least, clear your browser cache after any configuration change!
# Advanced Toolbar Configurator
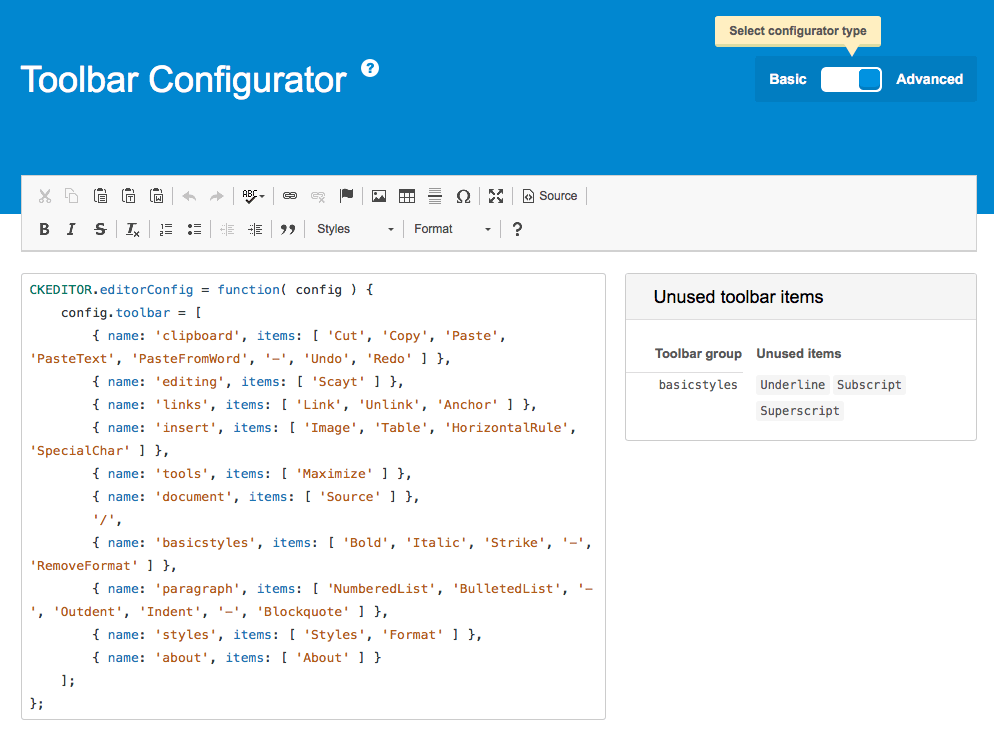
The basic, more visual toolbar configurator is based on the “toolbar groups” concept. However, if you would like to create a completely custom toolbar with an “item by item” configuration, and precisely define the visibility and position of each toolbar button, you can achieve this with the advanced toolbar configurator.

In this case you start with a CKEditor 4 instance and a code editor with current toolbar configuration. You can manually edit the toolbar code in the code editor and the toolbar preview will be updated live as you type. Unused toolbar items available in your editor configuration are listed on the right to make it easier to add them back should you wish to do so.
When you are happy with your toolbar, copy the modified toolbar configuration from the code editor. Add your new toolbar code to your editor configuration — if you have already changed some other configuration options, do remember to merge both configurations. Last but not least, clear your browser cache after any configuration change!
# Custom Toolbar Demo
See the working “Custom Editor Toolbar” sample that showcases an editor instance with a one-row toolbar set to include just a few most relevant editing features.
# Related Features
Refer to the following resources for more information about editor toolbar:
- The Understanding CKEditor Toolbar Concepts article explains the basic concepts behind the editor toolbar.
- The Toolbar Location feature lets you change the toolbar position in classic editor.
- The Shared Toolbar and Bottom Bar feature lets you place the toolbar in a designated page element and share it among multiple editor instances used on one page.


