How to Set Up a Custom Text Editor in 5 Minutes with CKEditor 5 Builder
Introduction to CKEditor 5 Builder
The CKEditor 5 Builder is a powerful tool designed to help developers, product managers, and integrators create a custom text editor that meets their specific needs. It provides a centralized and interactive platform where you can start with predefined presets and customize them by adding or removing features. This flexibility ensures that your editor is tailored precisely to your project requirements, enhancing the overall user experience.
Why Customize Your Text Editor?
Customizing your text editor with CKEditor 5 Builder offers several significant advantages. A custom editor improves user experience by providing the tools and functionalities that are most relevant to your users’ needs. This tailored approach can lead to more efficient workflows, reduced clutter, and the inclusion of features specific to your use case. Additionally, it enhances functionality by allowing you to integrate advanced features like real-time collaboration or AI assistance, ensuring your custom text editor can handle complex content creation tasks with ease.
Setting Up Your Custom Text Editor - Step-by-Step Guide
Creating your custom text editor with CKEditor 5 Builder is straightforward. Follow these steps to configure your editor:
Step 1: Access the CKEditor 5 Builder
Access the CKEditor 5 Builder
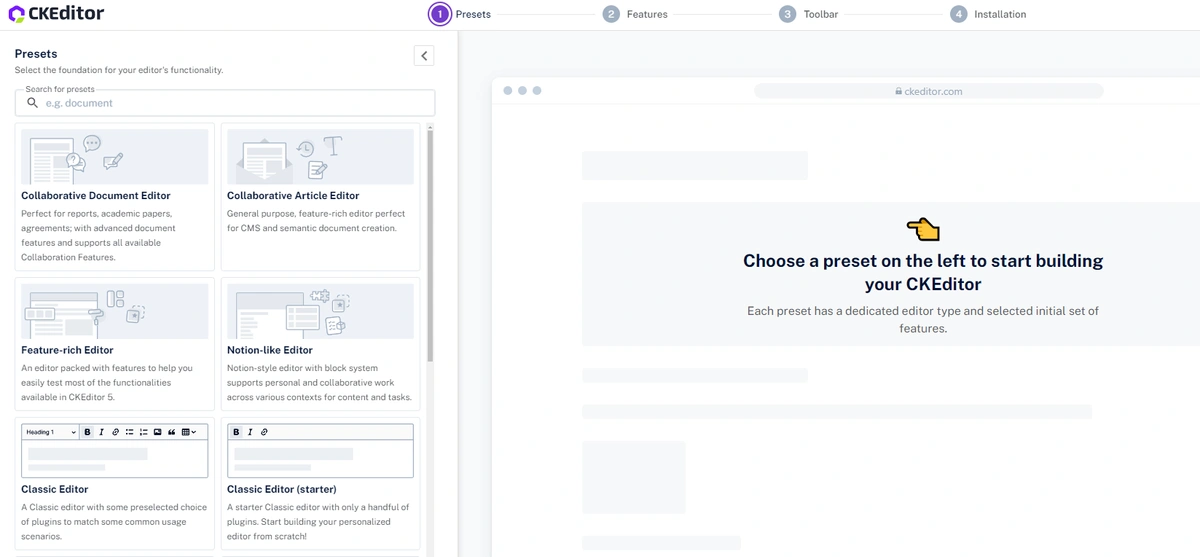
Navigate to the CKEditor 5 Builder, where you can start configuring your custom editor.
Step 2: Select the Classic Editor Preset
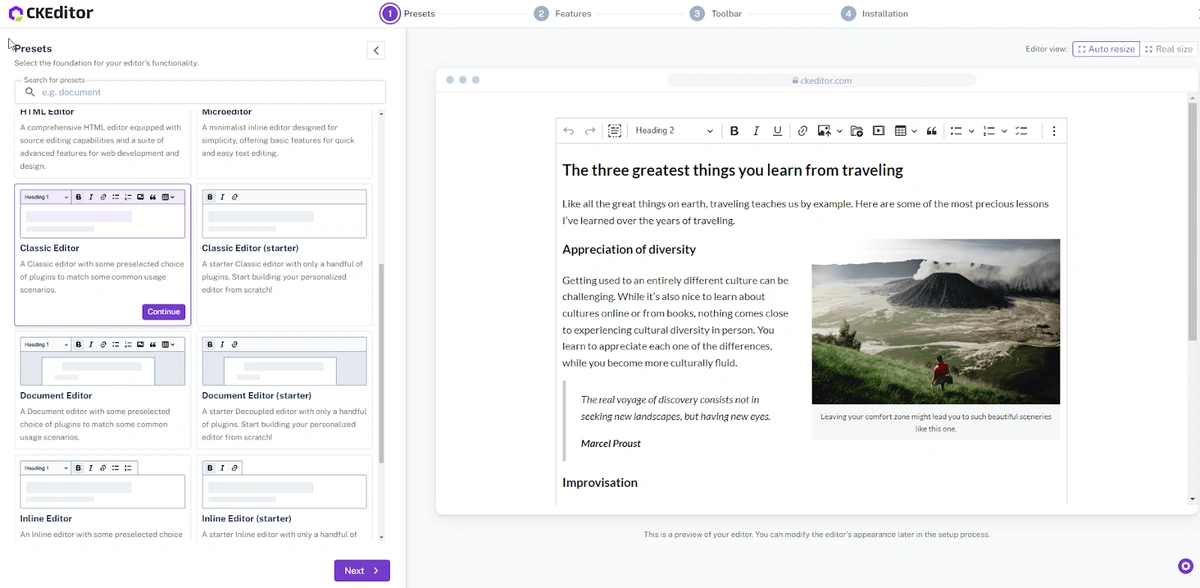
Choose the “HTML Editor” preset, which is equipped with advanced web development features, including source editing capabilities.
Step 3: Customize Features
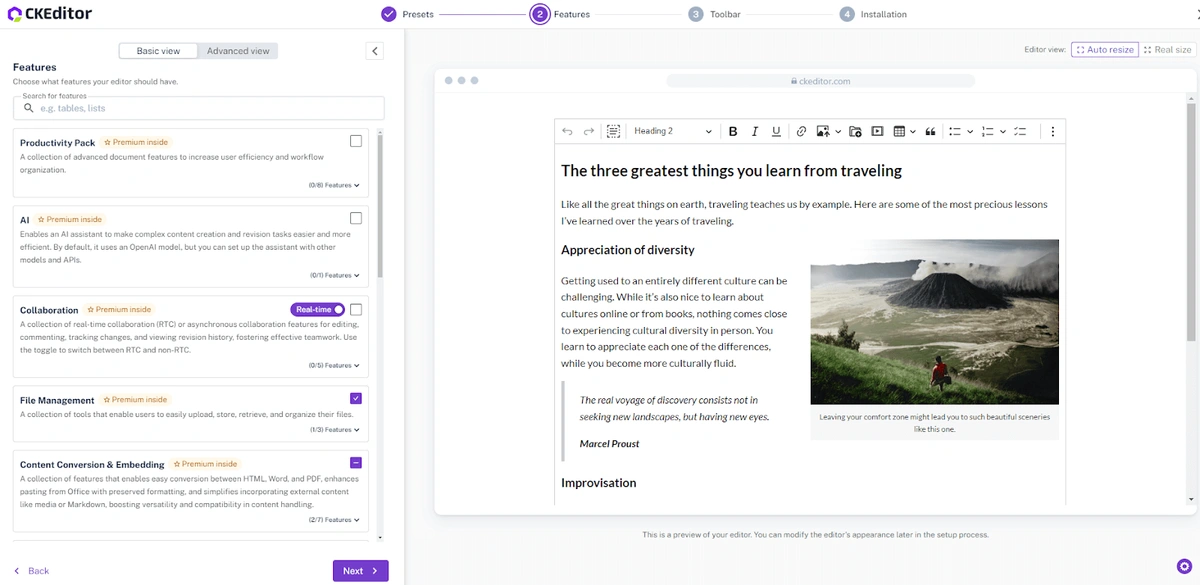
In this step, add or remove features to align the editor with your needs. You can switch to the Advanced View tab for more granular control, selecting individual features or sets.
Important Note: Some features require a premium license. If you opt for these, sign up for the 30-day free trial of CKEditor Premium Features or purchase a CKEditor license.
Step 4: Configure the Toolbar
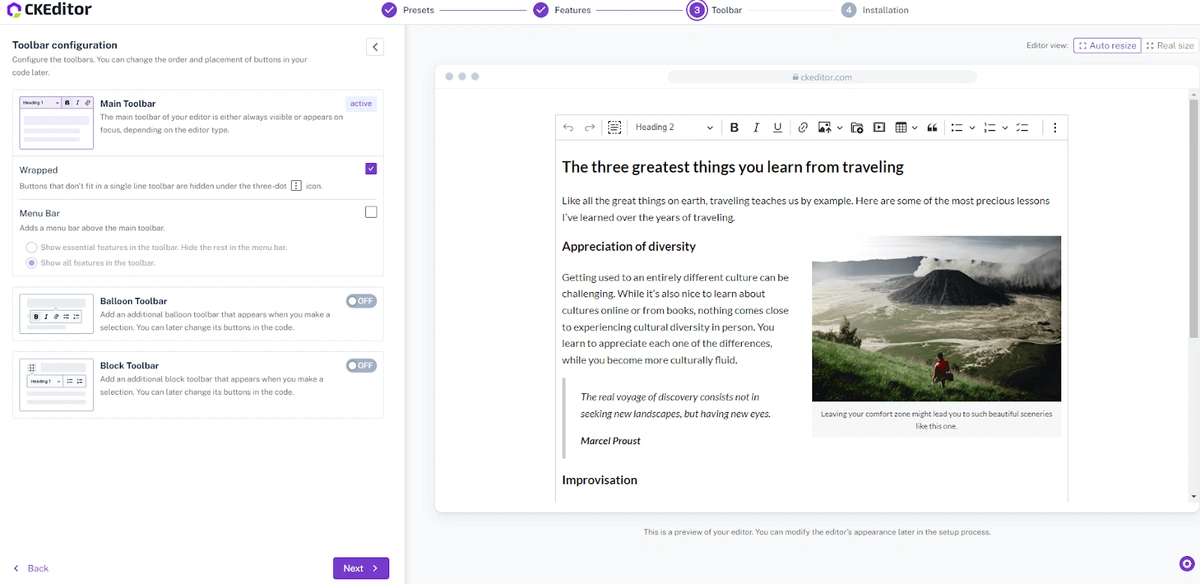
Customize the toolbar layout:
- Main Toolbar: Choose to always show the toolbar or display it on focus.
- Wrapped Toolbar: Enable buttons to wrap to a new line or hide under a “Show more” icon.
- Optional Toolbars: Add balloon or block toolbars for additional flexibility.
Step 5: Select Your Setup
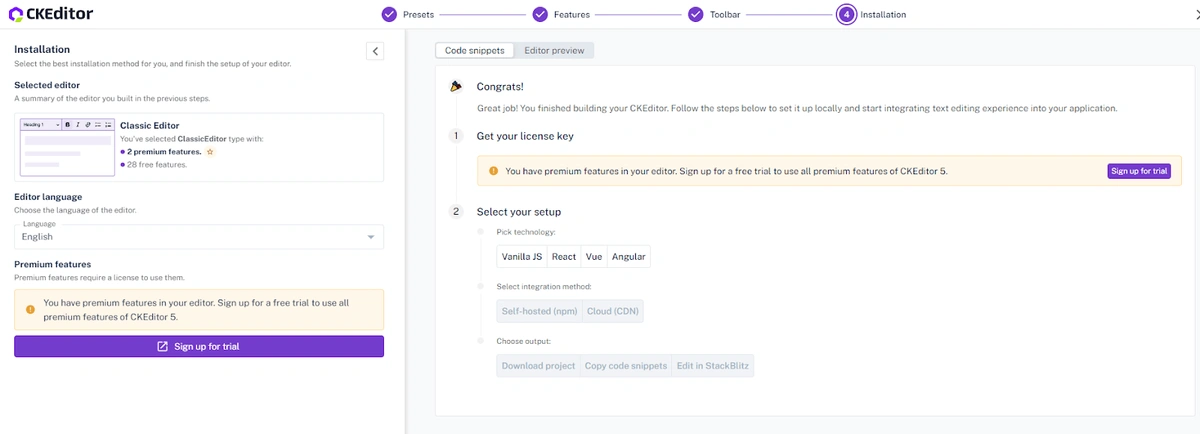
Choose Your Editor’s Language
Before diving into the technical setup, it’s important to select the language that best suits your audience. CKEditor 5 supports a wide range of languages, allowing you to tailor the editor to the linguistic preferences of your users.
Choose your preferred technology:
- Vanilla JS
- React
- Vue
- Angular
Select how you want to integrate CKEditor 5:
- Self-hosted (npm)
- Self-hosted (ZIP)
- Cloud (CDN)
Step 6: Licensing
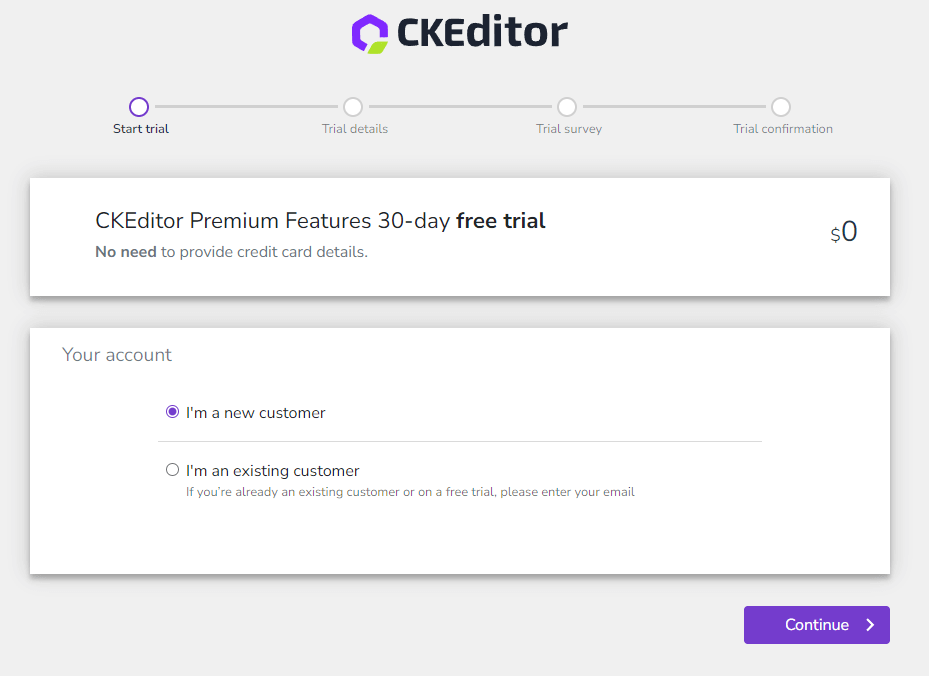
Obtain a license key by signing up for the 30-day free trial or purchasing a license.
Step 7: Install CKEditor 5
Follow the installation instructions provided in the builder to download and integrate your custom text editor.
Step 8: Explore Documentation and Support
Delve into the CKEditor 5 documentation to maximize the editor’s capabilities. Topics like feature configuration, data manipulation, and error troubleshooting are crucial for advanced setups.
Exploring CKEditor 5 Features Beyond the Basics
Once your custom text editor is set up, you can explore CKEditor 5's advanced features:
- Premium Plugins: Add functionalities like Real-Time Collaboration, Export to Word/PDF, and more.
- Autosaving: CKEditor provides an autosave feature that automatically saves the data (for example sends it to the server) when needed.
- Styling: Customize the look and feel of your editor to match your brand.
- Additional Configurations: Tailor the editor even further with options like toolbar customization and feature integration.
Final Thoughts and Next Steps
Customizing your text editor with CKEditor 5 Builder is an efficient way to ensure it meets your specific content creation needs. After setting up the basics, consider exploring advanced features and premium plugins to further enhance your editor’s capabilities. For more information on customization options, visit the CKEditor 5 Builder or try the CKEditor Premium Features with a 30-day free trial.


